
Cloudflare can be used for various integrations such as SSL, DDoS, Rate Limiting and CDN. This blog post covers only Cloudflare CDN integration with Drupal 9 and related configurations.
Here are some of the scenarios for web page getting displayed in the browser:
- Browser caches the web page and displays it for any subsequent hits to the same page as long as it is not stale.
- Drupal will cache the pages in DB (in the form of cache beans) and deliver the page for display with a minimum number of hits to DB.
We are going to introduce Cloudflare as an extra CDN cache layer on top of Drupal.
Here is quick visual snapshot of - what we are going to cover:
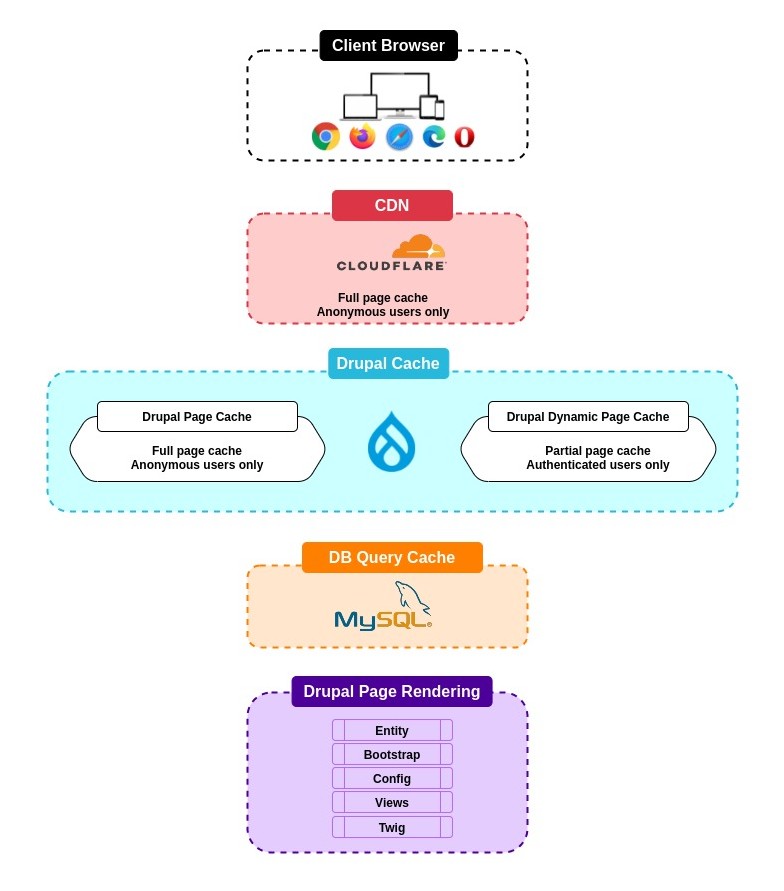
01. Change in caching scenario
- Cloudflare will cache the page in CDN and will deliver it to clients based on the nearest data center, this will make the hits to database only for the first time (and till the TTL is expired)
- Drupal needs to configure the purging rules so it can purge the Cloudflare cache based on certain conditions, such as - purge Cloudflare in case node content is changed.
02. Cloudflare Integration
You will need two Cloudflare modules
- Cloudflare [https://www.drupal.org/project/cloudflare]: This module facilitates the configuration form so Cloudflare can be integrated with Drupal 9 and will also enlist CLoudflare as CDN provider in Drupal configurations.
- Cloudflare Purge [https://www.drupal.org/project/cloudflare_purge]: This module facilitates the possibility of purging Cloudflare cache resource from Drupal itself - so there is no need to login to Cloudflare and purge it from there.
02.01. Install the required modules
Composer require drupal/cloudflare
Composer require drupal/cloudflare_purge
02.02. Configure Cloudflare Module
Go to [/admin/config/services/cloudflare]
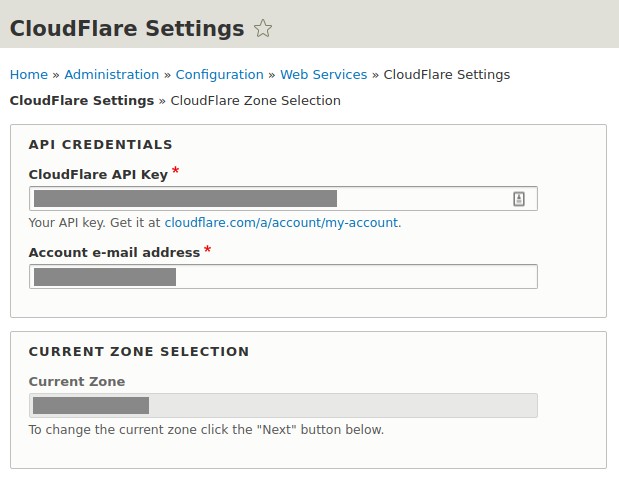
Cloudflare API Key
This is the GPA key which you can get from the API Token tab of your profile page in Cloudflare Dashboard.
Account email address
This is the same email id with which you have signed up in Cloudflare.
Once you save the credentials it should give you the success message and Current Zone Selection should happen automatically based on the specific zone available in Cloudflare account.
02.03. Validate it on performance configuration
So far you have successfully configured Cloudflare in your Drupal 9 site. Lets validate if Cloudflare is appearing as CDN.
Go to [/admin/config/development/performance/purge] and check if cloud flare is appearing in dropbox.
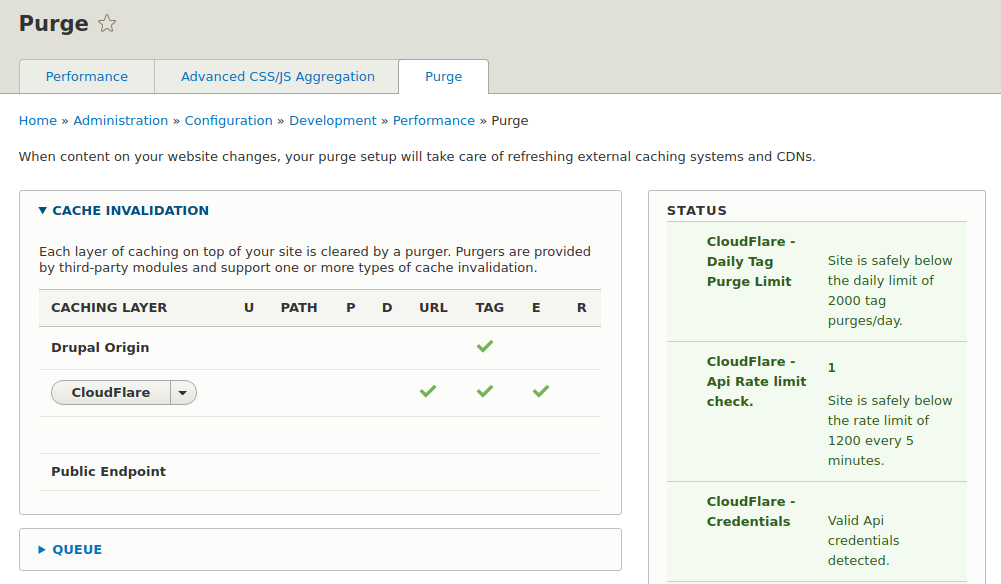
It should show “Valid Api credentials detected” against the Cloudflare Credentials in the right-hand-side status.
Now you can switch to Cloudflare dashboard and set the rules for caching
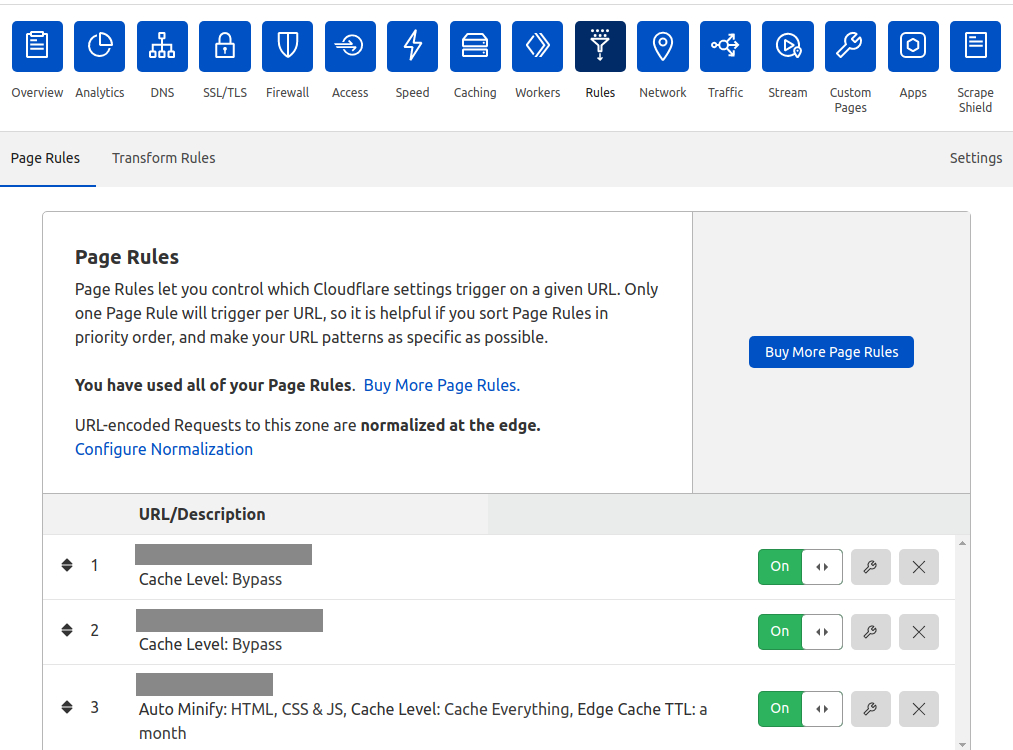
02.04. Cloudflare Rules
Once you login click on the Zone and then from the horizontal control operations click on the Rules.
- As a free account it allows only 3 rules to be added.
- I have simply added the rules to Bypass any admin pages and the pages specific to node modifications and cache the rest of pages.
- These rules can be altered as per the requirements.
03. Cloudflare Purge Module
03.01. Configure Cloudflare Purge Module
Go to [/admin/config/cloudflare-purge-form] and add the configurations
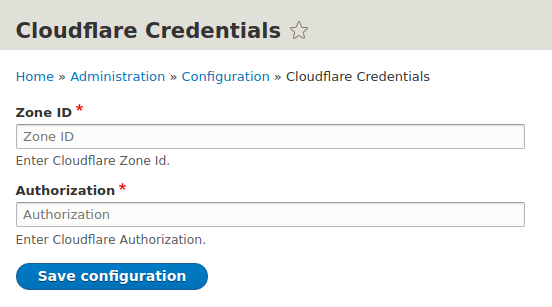
Zone ID
You can get this from the ZOne Overview page of Cloudflare Dashboard
Authorization
You will need to create the new Token from the API Token tab of your Cloudflare Profile page. You may select the option as per the screenshot below -
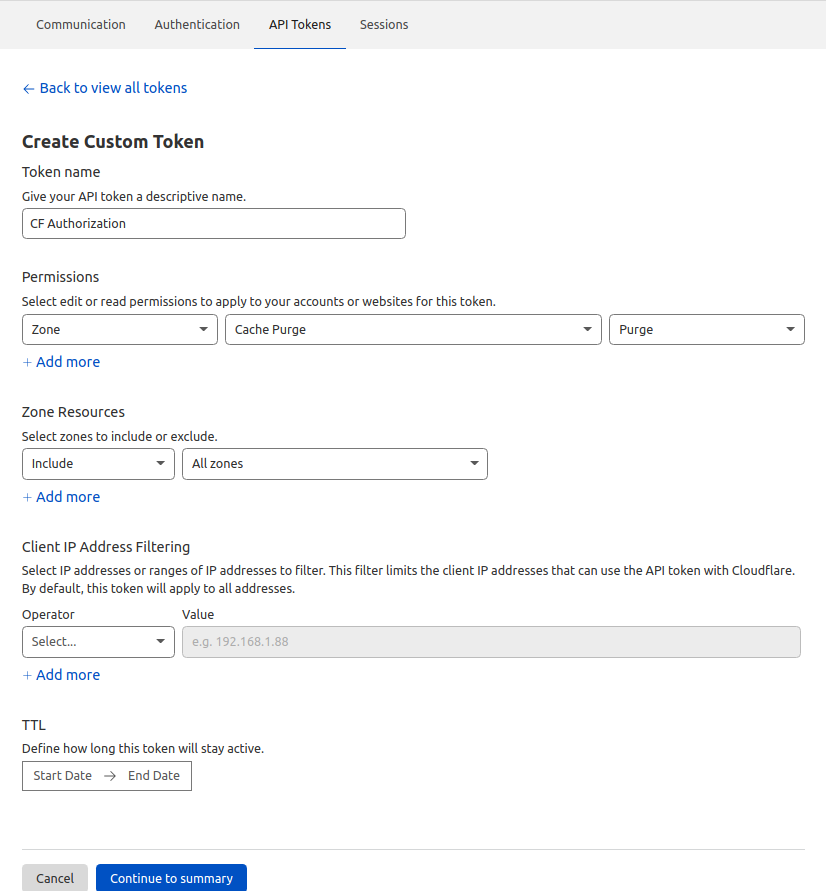
Once you save this - you can copy the Token and add it Authorization field on [/admin/config/cloudflare-purge-form]
03.02. Purge the Cloudflare Cache Resource
Once configuration is set correctly you can go to [Configuration -> Cloudflare Form -> Cloudflare Purge] - that should purge the Cloudflare Cache through the Drupal control panel.